A Guest Post by by Gavin Phillips
What is High Dynamic Range Imaging? (HDR)
HDR is when you take 3-5 or 7 photos at different exposure settings, and then merge them into a single image using speciality software. What you get are beautiful photos with incredible detail, controlled lighting and accurate colour. You cannot reproduce an HDR image manipulating a single JPG or RAW image in Photoshop.

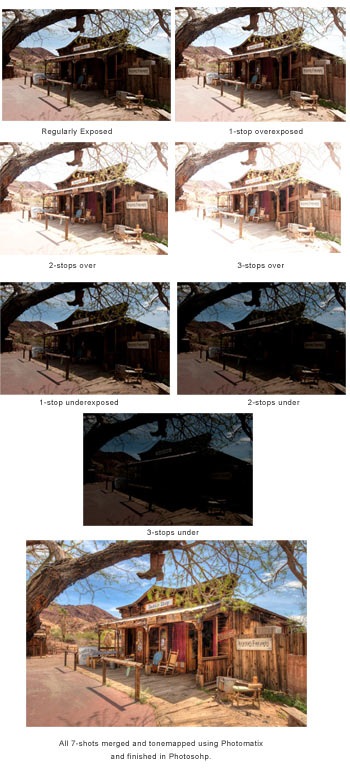
Below is an example of a set of 7 images taken at 1-stop exposure increments. Then merged and tone mapped.
The benefits of HDR
The human eye sees an outdoor or indoor scene quite differently than what can be captured with even top grade professional digital cameras and lenses. Not surprisingly, our eyes are far more complex.
Our eyes adjust for harsher light and render colors and detail more accurately than any single RAW file can capture.
With HDR you can produce wonderfully crisp images that have excellent detail and control of lighting. You do not need to worry about harsh sunlight or very contrasty scenes.
Below is an example of my regularly exposed single shot compared to my 7-shot HDR version. When printed, the HDR version has far more detail and an overall richer look to the image.

You control your final image
There is a lot of misunderstanding about HDR. As with all new creative techniques with so many creative opportunities available, we all tend to overdo it at the beginning.
This is okay, it is our way of experimenting and finding what we like and don’t like. For business applications, you can simply say what sells; although this may vary from client to client.
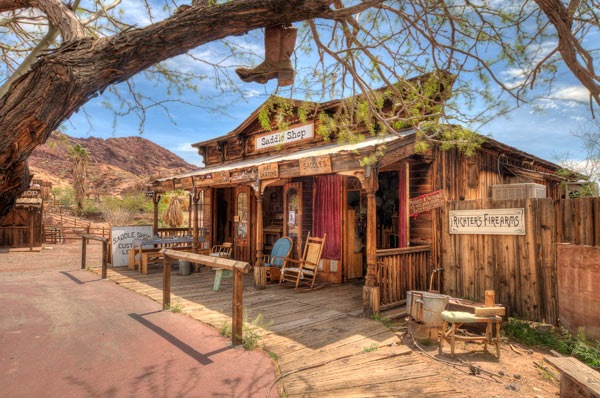
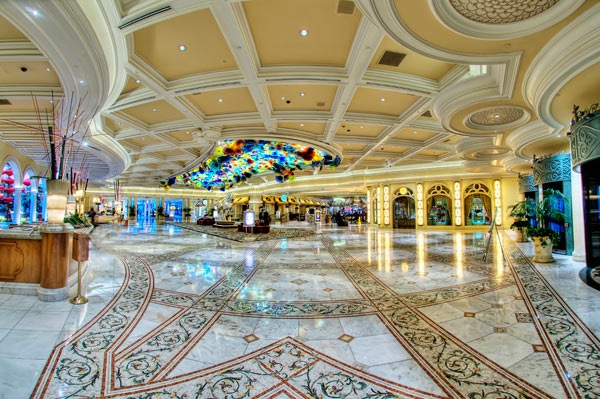
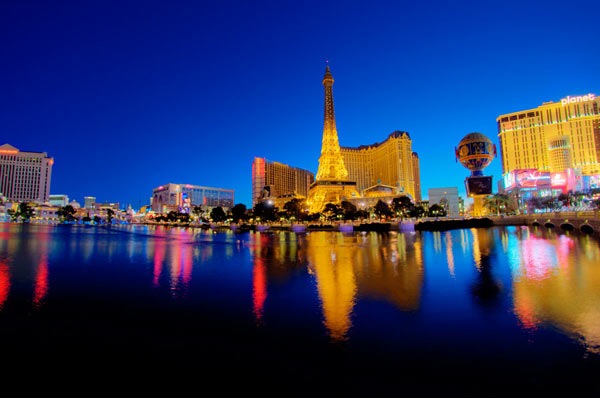
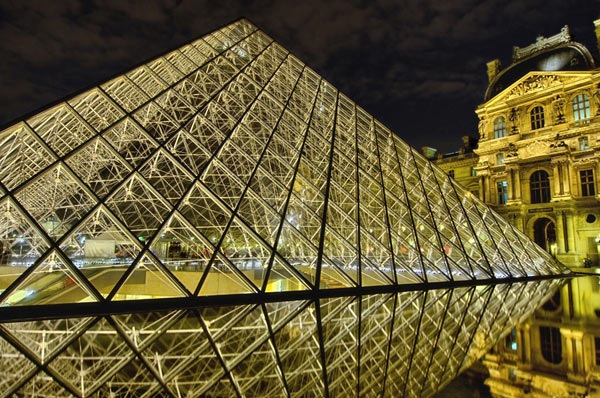
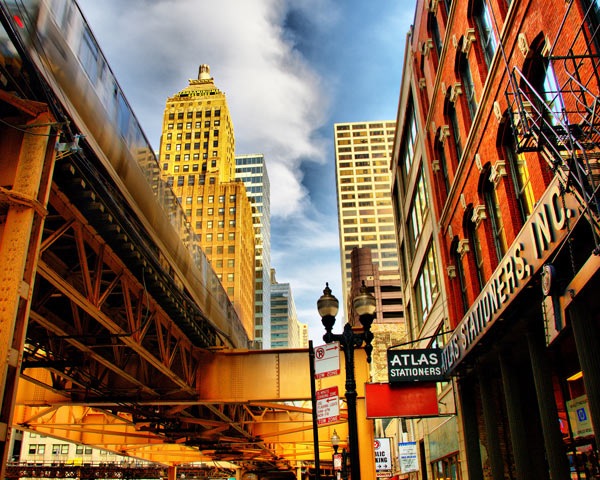
When would you shoot HDR?
- Landscapes
- Architectural and Commercial
- All interior shots
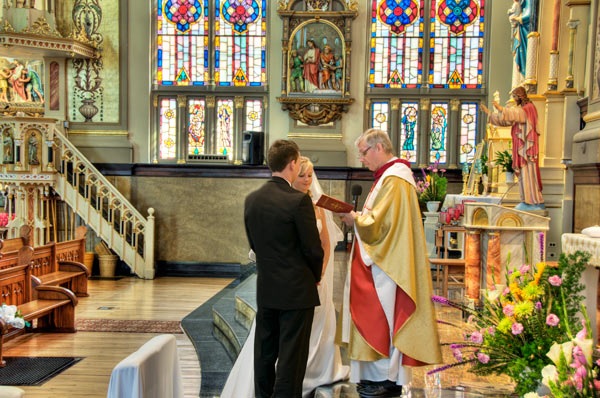
- Select wedding shots (church interior, vows)
- Wildlife (animals standing still)
- Night architectural
HDR in a Nutshell
- Take 3,5 or 7 shots at different exposures
- Merge bracketed sets into 32-bit images
- Tone-map in HDR specific software
- Finish in Photoshop
HDR Camera Set-up
Always shoot RAW. The RAW format is better for HDR than JPG. I have compared sets of JPG and RAW of the same scene and processed them in Photomatix and Artizen. The results are far better with the RAW images than the JPG.
Auto Exposure Bracketing Mode
Put your camera into the auto exposure bracketing mode. This allows you to run off a sequence of shots at different exposures by simply holding down the ‘shoot’ button.
It will depend on your camera as to how many you shoot in a sequence. Most DSLR cameras offer you up to 1-stop increments in bracketing mode. You would only ever go to a maximum of 2-stop increments. I shoot sets of 5 or 7 at 1-stop increments.
Some recent advanced compact cameras offer RAW shooting and Auto Exposure Bracketing.
Two that I know of are the Panasonic Lumix G3. It offers up to 7 shots at a max of 1-stop exposures. This is perfect for HDR. Also the Olympus E-PL3 offers RAW and up to 2-stops in AEB. These cameras are easy to carry around and offer a good introduction into digital HDR.
HDR Specific Software I Use
All these software programs are Mac/Windows compatible and offer free trial downloads.
Photomatix Pro
Photomatix offers many features and an intuitive, easy to use interface. It’s strength is outdoor daytime HDR. It really opens up shadows and produces very pleasing colours that are easily controlled with the sliders.
The batch processing feature is a huge time-saver. Merging one set of three, five or seven images into a 32-bit image can take from 10 seconds to over a minute, depending on your computer speed and how many images are in the set. If you have more than a few sets of HDR, (at Yosemite I had hundreds of sets) this consumes a large amount of time.
Photomatix’s batching feature allows you to merge dozens/hundreds of sets of HDR into 32-bit images automatically while you do something else. You then open the 32-bit image instantly in your software of choice and apply the tone-mapping, which is the only part that interests you.
With interior shots, Photomatix often introduces a blue cast into sunlight coming in through windows. I often use ‘Artizen’ or ‘Dynamic Photo HDR’ for interiors.
Artizen
I use Artizen for most of my interior HDR shots. Most of the time it gives me better results for what I’m looking for with interior shots.
Dynamic Photo HDR
I use DPHDR for some of my night HDR, and some daytime HDR as well. It depends how the image looks. It often creates more natural looking skies.
It’s also great if you want to go in a different creative direction. You can get a great variety of different colour effects.
But sometimes I see odd artefacts introduced into images; burnt skies or excessive noise. So I don’t recommend this program as your only HDR specific software. It is good to give you different creative ways to go.
HDR Efex Pro
Like all Nik software, HDR Efex Pro’s user interface is intuitive and easy to understand. I liked the variety of one-click presets, and it is easy to keep your HDR looking natural. I still prefer the colour in Photomatix for outdoor HDR though.
Nik’s patented ‘U Point Technology’ is included. With this you can fine-tune very specific areas in your image without effecting the rest of it.
Photoshop CS5 HDR
New to CS5 are some basic HDR tone-mapping sliders and presets. I have worked with it on some sets of HDR and compared it to the tone-mapping I get in the other software. The results are far better in Photomatix, etc.
Photoshop’s great strength is finessing the image after you have completed your tone-mapping. Removing blemishes, cloning, color, lighting correction and sharpening are essential, and none of the other software does this.
Single-shot ‘Pseudo HDR’
All the HDR software reviewed here give you an option to create a pseudo HDR out of a single RAW or JPG image. You really need RAW with single shot HDRs. The advantages are that you do not have to take multiple shots, and there will be no ‘ghosting’ to remove of people moving in the image.
However, you do not have the same dynamic range that you would have with multiple exposures. Pseudo HDRs tend to be noisy and you don’t get the same detail. But when you have rapidly moving people, animals or vehicles, pseudo HDRs often look far more interesting than just working the image in Photoshop. And they are very quick to process.
HDR and People
You can photograph people with HDR selectively. People posed, or a bride and groom standing still at the altar. Even if they are standing ‘still’ there is likely to be some slight movement between the frames.
This is referred to as ‘ghosting.’ The colour of the peoples faces will be incorrect as well. To correct this I use one of the bracketed set of regular RAW images and Photoshop to mask-in just the people into the HDR image.
It only takes 5-minutes. I only take a few HDR images with people in them. This captures the occasion in a way I could never achieve otherwise.

My HDR Work flow
My HDR Work flow I download all my HDR sets into a folder. I sort the winning sets in
Photoshop/Bridge or Lightroom, and move them to a ‘Winners’ folder. Different sets must be kept together. Don’t mix a set of three with a set of five or seven, it will completely mess up the batch processing.
Batch rename the winning sets in Photoshop or Lightroom with a number sequence. If I have 20 sets of five bracketed images, it will be numbered 1 through 100.
I then use Photomatix to batch my 20 sets of five into 20 single, 32-bit images. While Photomatix is doing this, I’m in Photoshop or doing something else.
When Photomatix finishes it’s batching, I go in and open the 32-bit images in Photomatix for tone-mapping. The tone-mapping is very fast. Once I set-up the sliders for the first image, I usually stay pretty close to those settings for the other images. I then finish the image in Photoshop.
Avoiding HDR Issues
Halos can be an issue with HDR images. Halos are usually found where the sky meets buildings or trees in an image. It is a line, or band, of lighter sky. It does not look natural and is very distracting.
You usually get if using extreme settings in your tone mapping, although sometimes you may still see halos even with conservative settings. In that case you may have to swap out the sky in your HDR image with the original sky in one of the bracketed images in Photoshop.
Over saturation is easily controlled in all the programs I reviewed here. Once you have the settings the way you like them, you can save them as one of your custom presets.
You have complete control over your image. It is easy to stay within a regular color range, but still gain a significant advantage by using HDR. You have to watch you do not overdo it, particularly with skies.
Finishing in Photoshop
Although the HDR specific software is great for the merging and tone-mapping
stage of your HDR sets, there is no substitute for the final finessing of your image in Photoshop.
I usually use a custom ‘curves’ adjustment. You can use the brush tool on the ‘curves’ mask to adjust how much of that curves is used in your image, and where it is used.
Another excellent, but often overlooked adjustment layer, is the ‘Shadow/Highlight’. There maybe areas of the image that require careful cloning out. Don’t forget that sometimes you can use the ‘spot healing brush’ to blend away something small in your image instead of always using the clone tool. Photoshop CS5’s new ‘content aware’ brush option is very handy for fast clean-up as well.
The last thing I do is selective sharpening. I use high pass sharpening for all my images that do not have people in the image. You find this under ‘Filter’, ‘Other’, ‘High Pass’. When people are in the image I use ‘unsharp mask’ or ‘smart sharpening’.

Creative Freedom
HDR gets quite a lot of criticism because many of the images are over-worked.
For that matter, any image can be overworked in Photoshop or any software, not only HDR.
Some photographers have become so worried about being criticised for using HDR, their HDR images look exactly the same as a single image worked in Photoshop. HDR is different; it has a vibrance and detail that is great for certain situations.
For some images I go further and use a full range of Photoshop adjustment layers, filters, masking and plug-ins to go in many different directions. We have so many creative tools to work with today; I’m not going to limit myself to staying within a regular photograph all the time.
As the late famous photographer Fred Picker stated, ‘Photographers owe nothing to reality.’ I offer my clients both types of images. Gavin Phillips offers HDR webinars and training movies. He also offers custom Photoshop ‘actions’ and Lightroom Presets. See his website for more information.


0 comments:
Post a Comment